Make a Dog Collar Kit Instructions
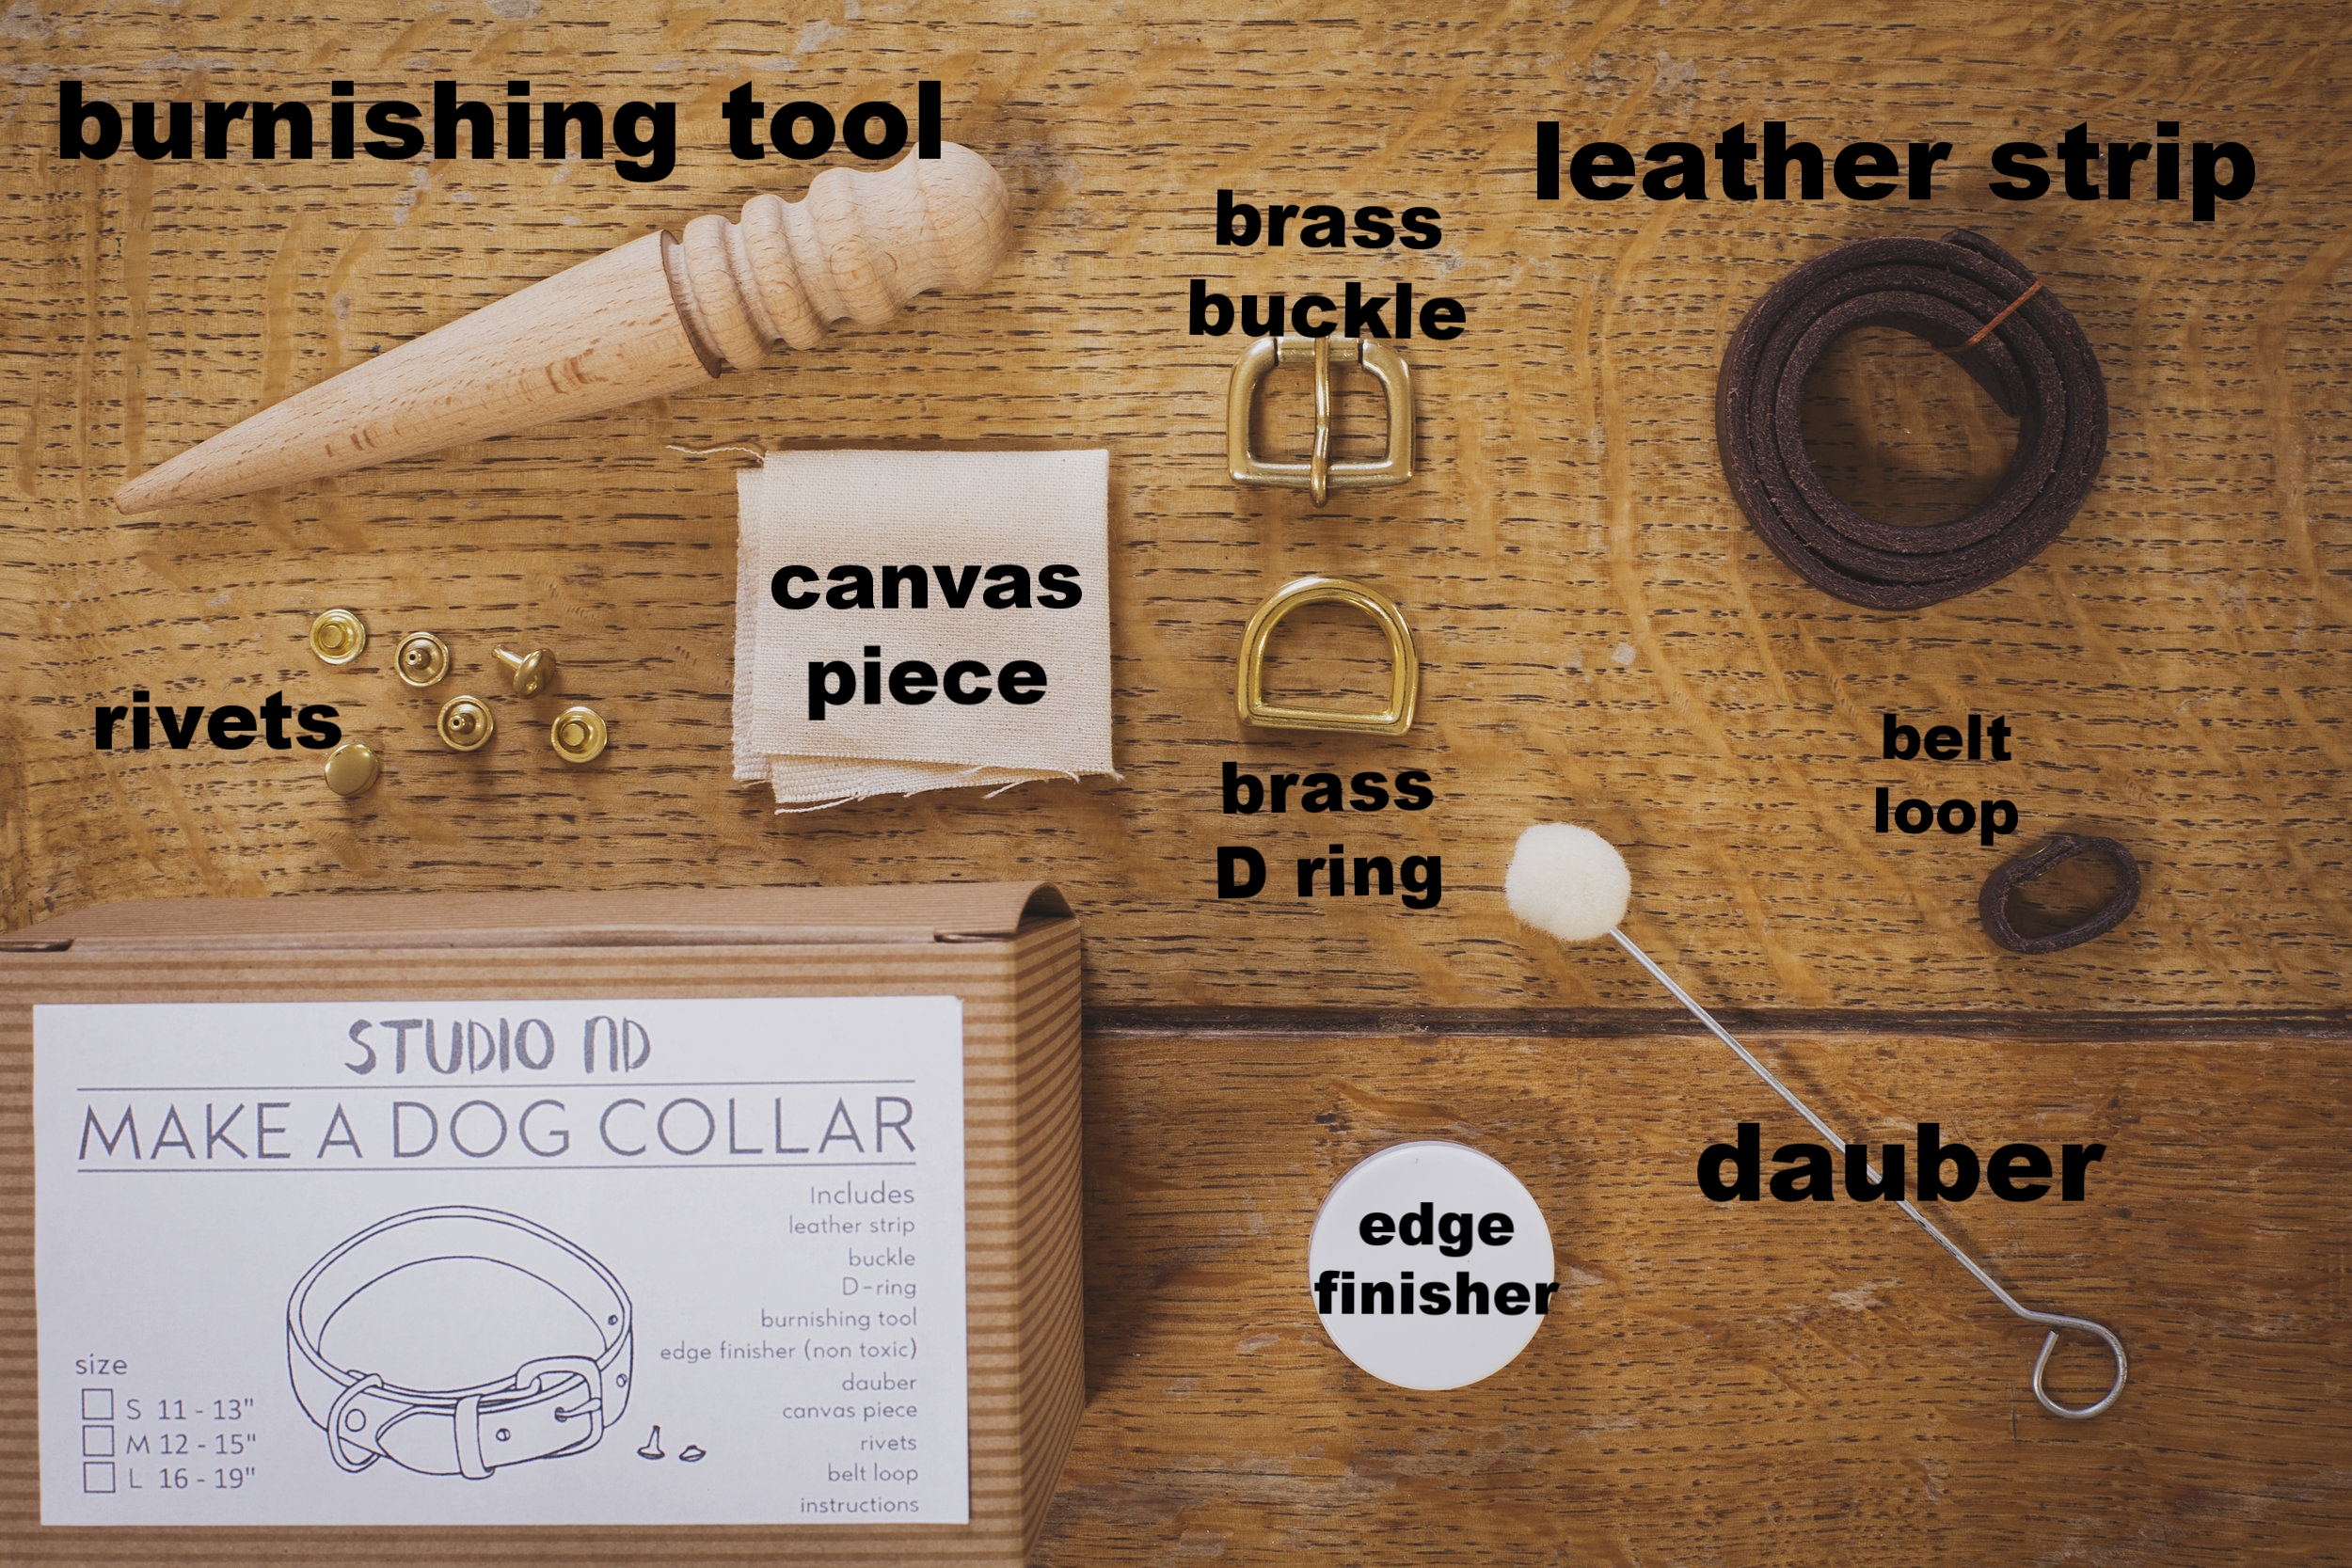
Thank you for buying the Studio ND 'Make a Dog Collar' kit. Below you will find step by step instructions with videos and diagrams to help you along the way. The whole process should take around two hours and in the end you will have a hand-made collar for your pooch! Start by familiarising yourself with the tools and materials. Your kit will also contain a small round metal plate not pictured below, this is a mini anvil used for riveting. You will need a small hammer for this project so have one handy.
The latest version of the kit now comes with Chicago screws instead of rivets and a mini anvil. If you have this kit, you will need a flat-head screwdriver instead of a hammer.

1. The first step is burnishing the edges of the dog collar. Burnishing is the process of polishing by rubbing fast, creating friction and heat. This is done in small sections of about 5-10cm. The video below shows the burnishing process more clearly.
Start by dipping the dauber into the edge finisher and coating just the edges of a 5-10cm section. You will only need a light covering. Leave to dry for a few seconds then use the burnishing tool to round the edges and seal them. Do this by choosing the groove best suited to the width of the dog collar and rubbing backwards and forwards quickly. Work your way all around the edges of the collar.
2. Working in sections again, seal the edges further using the canvas piece. Rub the edges quickly with the canvas piece whilst applying pressure. This is done by placing the collar flat on the edge of a cutting mat or board and rubbing whilst pressing down and in with your thumb and index finger. Do both sides to achieve an even shine and finish. Your edges should now be lovely and shiny.

3. Thread the buckle onto the end of the collar ensuring it is the right way round and feeding through the slot NOT the holes. The pin should be on top and facing down.


4. You are now ready to fit your first rivet. Watch the video below and follow the instructions. You will need a hammer for this stage. If your kit contains chicago screws, skip to step 5.

You will have four sets of double cap rivets in your kit. You should only need three, one is supplied as a spare in case you make a mistake. A pair is made of a cap with a stem which clicks onto the cap without a stem. Insert the stem into the hole closest to the buckle and then snap the cap onto the end of the stem from the other side.
Place the collar upside down on the round metal plate with the rivet in the centre. Be careful to ensure the rivet is not on the edge of the plate as this will mark the rivet. Using a small hammer, hit the rivet firmly but carefully a few times until it is flush with the leather. Check the rivet is fitted securely.
Slide the belt loop onto the front of the dog collar ensuring it is fitted between the two layers of leather. Repeat steps 1 and 2 with the next hole.
Slide the brass D ring into place. Again ensuring it is fitted between the two layers of leather. Repeat steps 1 and 2 again with the final rivet. If you make any mistakes with the rivets, they can be carefully removed with a good pair of pointed pliers or snips.

5. You will have three sets of chicago screws in your kit. Each set comes with a screw side and a front side with an opening for the screw. These can be easily attached with a flat-head screwdriver instead of a hammer.
Follow the steps above and when you are asked to set the rivets, instead of attaching the rivets and hammering, just insert the front of the chicago screw and attach the screw side from the back using a flat head screwdriver.
For extra security, you can also put a drop of superglue in the screw hole to secure it. You will need to screw it together immediately before the glue sets.
Your dog collar in finished and ready to wear!

Photos and video credit: Heather Birnie Photography